
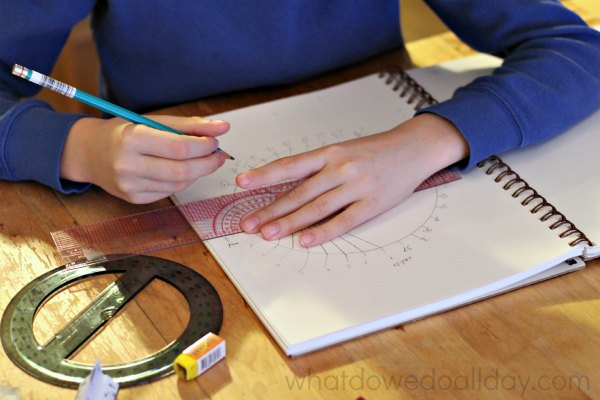
We adore math art projects. I've been eyeing the idea of using parabolic curves in a creative endeavor with my math-loving kid for a while. I was experimenting in my own art journal with the groovy way you can fool the eye into thinking a group of straight lines is actually a curve when my 10-year-old leaned over and said, "That is so cool!!"

That's when I knew I had a great math art activity for us to do together. Last week I shared our Fibonacci Art Project, and like that idea, drawing parabolic curves is a great way to explore STEAM (Science Technology Engineering Art Math) subjects!
(Note: this post contains affiliate links that earn from qualifying purchases.)
Instructions
I'll give you the basic instructions for how to make parabolic curves and then let you and your kids explore math art on your own!
What you need:
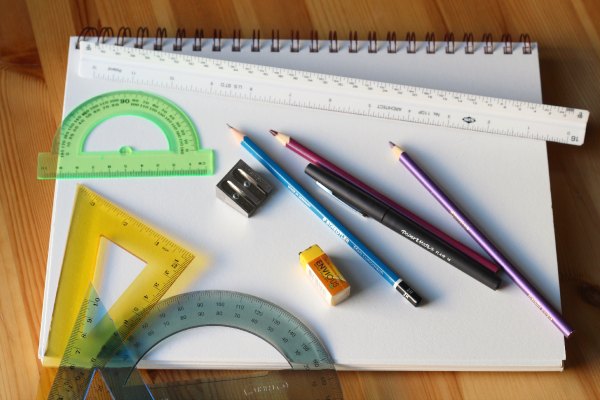
- Pencil (believe me, you do not want to start with ink!)
- Eraser (see above!)
- Pens
- Rulers or straight edges. It's easier to create squares if you have a triangle or t-square. I think it's well worth having a math set like this one. They aren't very expensive and they are loads of fun to draw with, not to mention being handy for school projects.
- Protractor. Optional, but a must if you want to do a circle design. We get a lot of use from our 360 degrees protractor
- Paper. We drew our math art in our art journals. The mixed media visual art journal is our absolute favorite, which regular readers (waving hello!) know that I frequently sing the praises of. Alternatively, you can use graph paper.
- Sharpener. You want sharp, sharp pencils for this project!
- Colored pencils. Optional, but fun.
Step by Step
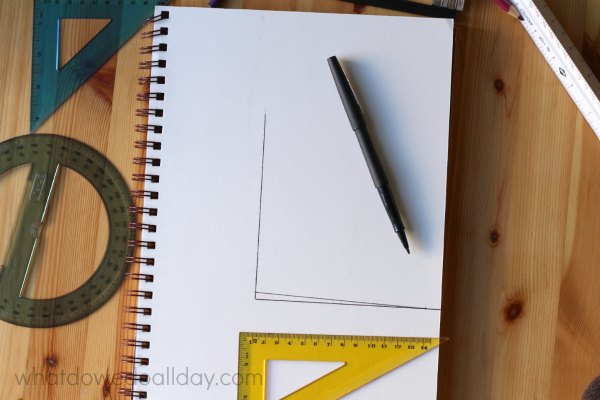
1. Create a set of crossed lines, preferably at a 90 degree angle. (Kids can experiment with different angles once they've learned the basics.) For ease, make sure each line is an even measurement. We used 1 cm and 5mm increments
2. Divide the lines into equal divisions. In my example I've uses 5 millimeter increments.
3. Draw angled lines. Start on the bottom line in the left hand corner at the furthest mark. (See photo above.) Draw a line from the mark to the first mark on the adjacent line. Draw a second line from the second furthest mark and connect it to the second mark on the adjacent line. (See photo below.)
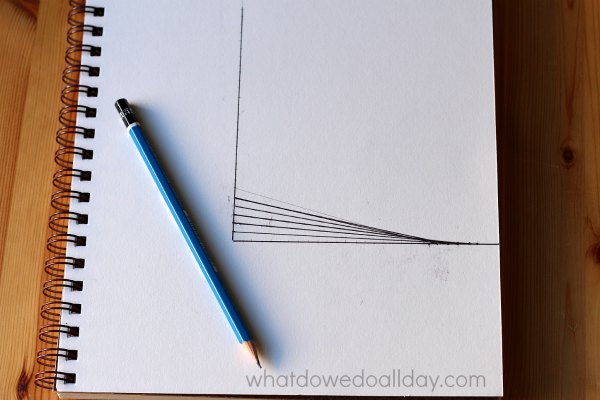
4. Continue until all the lines have been drawn.
TIP: The starting/ending points of the first and last few lines can get "lost". To make it easier, number the marks. (See photo below)
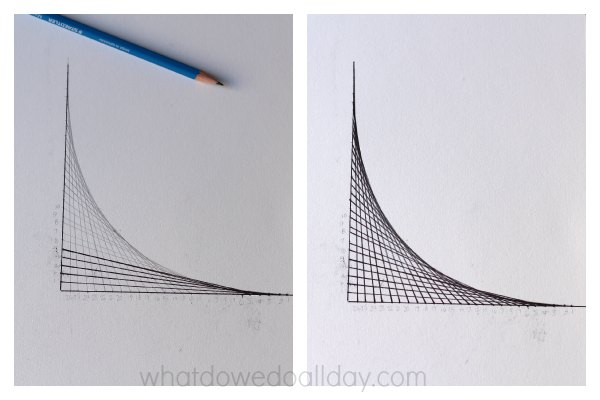
Voila! A "curved" line appears.
5. Optional: go over pencil lines with marker and/or use colored pencils to create colorful designs.
TIP: For kids just starting out, divide the lines with wider marks. My example above is 5 mm, but Kiddo preferred to work with 1 cm sections.
MORE MATH ART PROJECTS:
Variations:
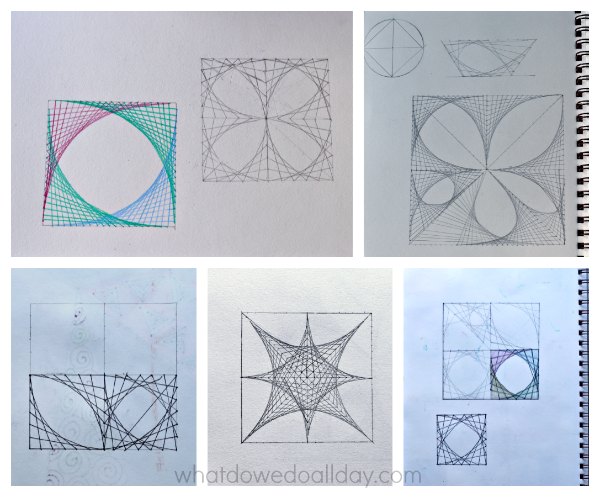
1. A single parabolic curve, while cool, is just the beginning. Encourage your kids to create boxes, triangles, and interlocking shapes as a basis to create elaborate math art designs!
2. Connect the dots in a circle! My son created a "parabolic eyeball".

For inspiration, here are some of our parabolic experiments, straight from our art journals.

Lise says
This is so cool!
I was just creating designs with pattern blocks the other day with my daughter, and we got all excited about how it began to resemble a circle, even though it was all straight lines and angles. This is a great way to take that a step further...
Erica MomandKiddo says
I hope you enjoy it!
Science Kiddo says
I love this math art! I used to make these kinds of pictures when I was a kid, just for fun. Thanks for linking up at STEM Saturday!
Susan says
I remember making patterns like this when I was in elementary school. Drawing the lines was only one way to do it - we also used thin card or counted cross-stitch fabric and a needle and embroidery thread, or we used pieces of wood with nails banged in to them. I remember visiting a classmate's home and her mother had one that she'd made hanging on the wall as artwork - painted black wood, black nails, and white threads. Precision placing of the holes or nails was key to a good design!
Erica MomandKiddo says
String art is very cool.
Rachel Price says
Hi,
This looks very effective, thanks for sharing. I'm wondering what 'math' you taught alongside this. what about parabolas did you discuss? This is pushing my own knowledge so I'd love to make some stronger math links as well as making a nice design.
Thanks
Erica MomandKiddo says
I don't homeschool so this was primarily for fun. I like to show my son how math can produce wonderful art. But of course you can certainly discuss the characteristics of parabola, their relationship to conical structures, and also symmetry.
Laura says
I really love this! These are so much fun with all the different ways you can play with them. Thank you for the inspiration for a lesson I'm planning for our homeschool co-op. I just want to mention that I don't believe these are actually parabolic curves. They are geometric curves. Thank you again for all your wonderful posts and videos, I am really enjoying them!
Erica says
Thanks for that! I'll have to figure out the difference between a parabolic and a geometric curve. Good luck with your lesson!
Sebastien says
A couple of years late, but I just wanted to mention for anyone reading this that this project does indeed create a genuine parabola. It takes a bit of calculus to verify, (or at least that's the only way I could think of to prove it) so unless your kids are towards the end of high school it's probably not worth it to verify. This with them. If they have started calculus though it's actually an interesting project involving optimization to find the equation of the curve.
Without calculus you can at least do a pretty cool experiment to see the properties of a parabola. The 90 degree angle where your two original guide lines meet lies on the directrix of the parabola. So if you fold your paper in half on that corner so that the two original guidelines torch you'll get the axis of symmetry of the parabola on that fold. Then draw a line perpendicular to the axis stating at your original corner (I just used another sheet of paper to get a 90 degree angle and put it at the corner where the two guide lines meet with one edge on the axis). This line that is at a 90 degree angle with the axis is the directrix. Lastly, you can find the focus by going along the axis from the intersection of the guidelines to the curve then doubling that distance. If you look up some things about parabols you'll find that any point on the parabola is the same distance from the focus and the directx.
Finding the formula for your curve is much more involved and requires calculus I think. Briefly outlined, each of the lines you draw goes through a point "t" on the x axis and "1-t" on the y axis. High school kids taking calc should be able to derive the equation y = [(t - 1)/t]x +1-t for any given line. The curve is generated by the top line for any given vertical value, so you can have them find the maximum value over all "t" for a fixed value of "x". It helps to simplify the linear equation to "y = (1 - 1/t)x + 1 - t before taking the derivative. Solving should give them the critical point t = the square root of x. They can plug that back into the linear equation to get the formula for the curve as "y = x - 2sqrt(x) +1.
They may or may not know how to do a linear change of variables at this point (it's not always taught in algebra 2 or pre calc) but if they do know how, have them change variables to u and v with x = 1/2 (u+v) and y = 1/2 (u - v). This will result in the traditional quadratic for a parabola.
Erica says
Wow! Thanks for all that information! It is a little (okay, a lot) more than I can digest, but I bet my son knows exactly what you are talking about!
Mike T says
This technique has a practical use as well. It has been used for millennium in architecture to layout archways. I’m a cabinetmaker and finish carpenter and I used this technique a number of times to build archways and porthole windows.